Showing posts with label In the kitchen. Show all posts

Friday, June 3, 2011

In the Kitchen: Strawberry Shortcake Cookies


Strawberry season is here! I love finding new recipes to make with all the delicious local strawberries out there right now. Of course, they're great for just eating fresh, but there are a lot of fun ways to use up all those berries.

This recipe came to me from Martha Stewart's Cookie of the Day e-mail, Strawberry Shortcake Cookies. It really is like a portable strawberry shortcake; the cookie itself is like a sweet biscuit. They were amazing - slightly crisp on the outside with a great biscuit inside -  on day 1, but by day 2 were a bit soggy. I'd suggest making them on a day or for an occasion where you know you will consume them all that day. The upside is that they are so easy to put together, it isn't a lot of trouble to make - and eat - them on the same day.

One more note: The recipe from the web site says it makes 3 dozen. I used a bigger scoop than called for and got 1 dozen. Whoops. I am an admitted sugar freak, but I thought the palm-sized cookies that resulted were a good serving size. And since they are best eaten that day, I think 12 larger cookies is much more doable than 3 dozen.


Strawberry Shortcake Cookies
from Martha Stewart Living

12 ounces strawberries, hulled and cut into 1/4-inch dice (2 cups)
1 teaspoon fresh lemon juice
1/2 cup plus 1 tablespoon granulated sugar
2 cups all-purpose flour
2 teaspoons baking powder
1/2 teaspoon coarse salt
3 ounces (6 tablespoons) cold unsalted butter, cut into small pieces
2/3 cup heavy cream
Sanding sugar, for sprinkling
  1. Preheat oven to 375 degrees. Combine strawberries, lemon juice, and 2 tablespoons granulated sugar. Whisk together flour, baking powder, salt, and remaining 7 tablespoons granulated sugar in a large bowl. Cut in the butter with a pastry cutter, or rub in with your fingers, until mixture resembles coarse crumbs. Stir in cream and strawberry mixture until dough comes together.
  2. Using a 1 1/2-inch ice cream scoop or a tablespoon, drop dough onto baking sheets lined with parchment, spacing evenly apart. Sprinkle with sanding sugar, and bake until golden brown, 24 to 25 minutes (this might take longer if you make the larger size). Transfer to a wire rack, and let cool. Cookies are best served immediately, but can be stored in an airtight container at room temperature for up to 1 day.

Monday, November 1, 2010

I got a rock.

Halloween is an interesting time of year. For 364 days out of the year, we tell our kids, strangers are bad. Don't talk to strangers. And for goodness sakes, don't take candy from strangers. Unless it's Halloween. Then, by all means, take their candy. And if they're doling out the full-size candy bars, go home, throw together another costume, go back and take more of their candy.

Last night, I paid my daughter for all of her chocolate candy. After dinner, she dumped out her bag of candy, separated her chocolates from her non-chocolates and presented me with a box filled with Snickers, Milky Ways, Kit Kats, Reese's Cups... pretty much the stuff of my childhood dreams. But she hates all of it. She hates - yes, hates - chocolate. While out trick or treating, she was very polite, dutifully saying thank you no matter what was dropped into her bucket. When she'd come back to me, she'd mutter in this dejected voice, "Chocolate." You would have thought she had just gotten a rock dropped into her bucket instead of bits of chocolatey deliciousness. At least promising her money for each piece of chocolate helped with her disappointment.

As luck would have it, one girl's rock is another girl's baking treasure. Last year I used her discarded Reese's cups for some pretty tasty Peanut Butter Cup Blondies (thanks to that blondie recipe I told you about before). I'm thinking of doing a mix this time around, sort of a candy bowl blondie. I'll let you know how it turns out.

Thursday, September 9, 2010

Much love for the mix


A couple of years ago, I came across a recipe in Everyday Food for a baking mix that could be used for four different recipes. One recipe was for a Chewy Oatmeal Blondie, one was... you know what? Sorry. I didn't get past Chewy Oatmeal Blondie. I read "Chewy Oatmeal Blondie" and that was it. I was sold. Wouldn't you be?

The blondies turned out to be one of the most versatile, delicious, and easy to pull together recipes I have come across, and since then I have kept a batch of that baking mix on hand - tweaked a bit with some whole wheat flour - when life calls for... nay, demands, a blondie (Sometimes I think I hear that demand a little more than others).

A few weeks back I came across that Everyday Food issue and found the recipe for the mix again. This time, I made it past the Chewy Oatmeal Blondies and saw Jam Sandwich Cookies. I was on a bit of a jam kick this summer, so of course this caught my eye. Then something else did as well - the entire cookie is just three ingredients - the mix, butter and milk.

So the other day, I trotted out that baking mix to make Jam Sandwich cookies. The recipe is beyond easy - mix and butter in the food processor, then add milk. Bake, fill and eat. I filled mine with the blueberry and strawberry jam I made earlier this summer. Yum.

Maybe in a couple of years, I'll try out another recipe for the mix. Until then, it's jam sandwiches and blondies all the way. Not a bad way to be.

Everyday Baking Mix
(adapted from Everyday Food, April 2008)
Makes 9 cups
3 cups all-purpose flour, spooned and leveled
3 cups whole wheat flour, spooned and leveled
3 cups sugar
2 tablespoons baking powder
1 tablespoon salt

In a large bowl, whisk together flour, sugar, baking powder, and salt. Store in an airtight container at room temperature up to 3 months. Whisk before using.


Jam Sandwich Cookies

(from Everyday Food)
4 cups Everyday Baking Mix, spooned and leveled
1 cup (2 sticks) cold unsalted butter, cut into pieces
1/2 cup whole milk (I used 2 percent with no ill effects)
3/4 cup seedless jam or jelly

Preheat oven to 350 degrees. Line two baking sheets with parchment paper. In a food processor, pulse baking mix and butter until mixture resembles coarse meal. Add milk; pulse until a dough forms.
Drop dough by heaping tablespoons onto sheets, 4 inches apart. (You will fit about 9 cookies to a sheet; bake in two batches to make a total of 36 cookies.) Bake until cookies begin to turn golden but center is still pale, 12 to 14 minutes, rotating sheets halfway through. Transfer to a wire rack to cool completely.
Spread flat side of half the cookies with 2 teaspoons jam each; sandwich with remaining cookies.

And the recipe for the Chewy Oatmeal Blondies can be found here...

Monday, August 23, 2010

Tomatoes - Part Deux

Our tomato windfall continues here, and I finally had a half decent looking pepper come out of our garden - a jalapeno. So it was time to put two and two - or in actuality, 15 and 1 - together, and make some salsa. In my head, I hear Jerry Seinfeld's voice saying, "Excuse me, do you have any salsa?" "We need more salsa." "Where is the salsa? No salsa?"

Well, we now have salsa. It's real, and it is spectacular.


Unfortunately, my rules for salsa making are much like my rules for sauce making: as little contact with the tomatoes as possible. That eliminates pretty much all of the fresh salsa recipes out there, which is ok, because a bowl full of tomato chunks might hit the spot for some, but not me. I'm more the person who dips their chip in, soaking up the accumulating juices and avoiding any large chunks of anything- and leaving you with some dried up tomato and onion bits in the bowl. Oh yeah, that's just how I roll, baby.

I came across a recipe on All Recipes that sounded absolutely perfect to me. Like the sauce recipe I posted previously, everything gets thrown in the oven. The idea of a roasted tomato salsa sounded really good and a little different, so I was ready to give it a try.

It starts out easy enough - toss 12 whole tomatoes (I used 15 to make up for a few smaller ones from the garden), a jalapeno pepper, a quartered onion and 2 garlic cloves, still in the skin, into a baking dish. Drizzle with some olive oil. This goes under the broiler for about 10 minutes - I wanted to make sure everything was good and roasted - so I did a flip about halfway through and bumped it up to 15. It worked for me but probably unnecessary.

They come out looking... well, roasted. The smell is delightful, though. From there I took the tomatoes, cut off the top and pressed on them with the back of a chef's knife to remove some of the extra water and seeds. Leave the skins on though - it gives the salsa a bit of a smokey flavor. The tomatoes went into the food processor, along with the onions. Then I split the jalapeno in half, removed the stem, got rid of about half of the ribs and seeds and dropped it in the food processor. Same with the garlic (smash them with the back of your knife and they slide right out of the skin). A few pulses... then a few more pulses (you do recall the general distaste for large chunks, right?). Into this mix goes a nice amount of cumin, lime juice and cilantro. Stir and pop it into the fridge - unless lukewarm salsa is your thing.

Not that there's anything wrong with that.


Roasted Tomato Salsa

(adapted from allrecipes.com)

12-15 Roma (plum) tomatoes
2 cloves garlic, unpeeled
1 small onion, quartered (I used a Pennsylvania sweet onion, but I think any type would work)
1 jalapeno pepper
Olive oil to drizzle
1 teaspoon cumin (I went over this - I love me some cumin. Just adjust to your taste)
1/4 teaspoon salt
3 tablespoons fresh lime juice
1/4 cup chopped fresh cilantro

Preheat the broiler. In a medium baking dish, place tomatoes, garlic, onion and jalapeno. Drizzle with olive oil.
Broil for 10 minutes, checking often, or until outsides of vegetables are charred.
Remove from heat. Remove and discard tomato cores, jalapeno stem (and some or all of the ribs and seeds, depending on your heat tolerance) and garlic skins.
Process the charred vegetables in the food processor. Transfer to a medium bowl, and mix in cumin, salt, lime juice and cilantro.

Thursday, August 12, 2010

Pass the tommy-toes

Full disclosure: I hate tomatoes. Hate. I am using the word "hate" here, about tomatoes (thanks Jack Nicholson). So of course the one thing in my little backyard garden that has actually produced anything would be.. yes, you guessed it.


Ok, ok... I will admit that I have gotten a fair amount of herbs - basil, rosemary oregano and parsley. And earlier this summer, I will concede that we had a few decent salads from some lettuce I planted. But the peppers and strawberries were nonexistent. The cucumbers measly. The tomatoes, however... well according to our tomato lovers in the family, the tomatoes have been delicious.

There I was, looking at what turned out to be 6 pounds of Roma tomatoes - from ONE plant -- with a sprinkling of cherry tomatoes from my other lone plant. All from my otherwise pathetic garden. So I did what any self-respecting, tomato hating, yet equal opportunity giving cook would do - made tomato sauce.

But there are rules here. Yes, rules about tomato sauce making (this is where my crazy comes out). 1. I wanted as little to do with the tomatoes as possible. That means no seeding, no peeling. The less actual contact with the tomatoes, the better. 2. The sauce had to be smooth. No pieces or chunks of tomato. I'm kind of like a 9 year old in that regard. 3. I was not about to spend hours tending to a hot simmering pot of tomato sauce. It's AUGUST, for crying out loud.

It turns out those requirements don't leave you with a lot of options. It was hard enough tracking down a recipe that didn't call for canned tomatoes. Then I found it-the perfect recipe. Really. Read on.

It starts with quartering the tomatoes. No need to blanch and peel them. No seeding, no dicing. I'm already in. Add to that a couple of onions, roughly chopped, a whole lot of garlic, along with some herbs (I used basil and oregano). Toss it in a 13x9 pan with some olive oil. That's the prep involved. This was my kind of recipe.

But it gets better: the vegetables are roasted. No breaking up tomatoes with your spoon, no simmering. Delightful. And the kicker? Once it's done, it all goes through a food mill. No big chunks of anything. Heaven. And I hadn't even tried it yet.

And then I did - yum. Am I allowed to use that word about something that started as a tomato? But this was good - the roasting gave the sauce a really rich flavor. For dinner that night, I sauteed some cremini mushrooms, tossed in some of the sauce and served it over pasta. So easy, and everyone loved it.

Is it possible that I'm thinking of planting two Roma tomato plants next year?


Roasted Tomato Sauce
(adapted from Bluekat76's recipe at Dave's Garden)

4 pounds tomatoes, stemmed and quartered
2 yellow or other onions (I used a couple of sweet onions I picked up from Soergel's)
16 cloves fresh garlic
1/4 cup olive oil
Fresh basil and oregano (about 3 tablespoons chopped)
A healthy shake of dried red pepper flakes

Combine ingredients in a 9x13 inch pan. Roast at 450°F for 1 1/2 to 2 hours, until juices get thick. Tomatoes will get a bit blackened and will smell wonderful.

Let cool, and run through a food mill to remove skins & seeds. Season with salt and pepper.

Tuesday, August 3, 2010

When good diets go bad

There are some ingredients that just mess with my sense of right and wrong.

Perhaps I should explain. A piece of chocolate has never sent me on a robbery spree or landed me in jail on assault charges -although I will not hesitate to throw a few elbows for a corner piece of cake.

I'm saying that I know it's wrong to make a sauce using a stick of butter. I know it's wrong to add a mass of pancetta to that melted stick of butter. But this is gnocchi we're talking about. Delicious, puffy gobs of potato-ey goodness. And this wasn't just any gnocchi. This was sweet potato gnocchi. Rules must be bent.

I suppose I could have done a light marinara sauce. But I wanted to play with that natural sweetness from the sweet potato. A brown butter sauce was a good start. And to the sweet, why not add some salty? The pancetta was calling my name. More likely an artery's name, but what do you know? We're named the same thing. So pancetta it was. A bit of nutmeg, a couple of healthy pinches of cinnamon, fresh rosemary and little grating of Parmesan rounded it out. Yum.

We had a salad with it, so I think that makes it a little better, right? But come on, a little indulgence once in a while is never a bad thing.


Sweet Potato Gnocchi with Pancetta
(makes four servings)

1 lb. of sweet potato gnocchi (I picked mine up from the Dormont Farmers Market.)
3/4 stick unsalted butter
4 oz. diced pancetta
1/2 tsp. freshly grated nutmeg
2 healthy pinches ground cinnamon
2 tablespoons fresh rosemary
course salt and fresh ground pepper
Parmesan cheese

Melt butter in a medium skillet. Add pancetta and cook until brown and slightly crispy. Add the rosemary and continue cooking for another 2 minutes. Add the nutmeg, cinnamon, and salt and pepper to taste.
Meanwhile, cook gnocchi according to package directions. Drain well and add to butter sauce. Toss with the sauce until coated.. Divide among plates and sprinkle with Parmesan cheese. Eat now, regret later.

Wednesday, July 21, 2010

Jammin' on the one


I'm not sure who the masochist is that came up with the idea of jam. Don't get me wrong - homemade jam is, well, awesome. But I just can't imagine the person who, in the middle of the summer, saw a berry harvest and, wiping the sweat off their brow, thought, "Hmm, I think I'll take these berries and heat them until I have a hot boiling pot of sugar and fruit - but I'll want to stand over said hot boiling pot stirring it the entire time. And then, I'll put the insanely superheated result in some hot jars and then put those jars into a vat of boiling water." Getting the theme here? That being said, I guess I'm a masochist. I love me some jam, and I've discovered I love making it.

My first experience at making jam came late this spring after a trip to Trax Farms in Washington County, where we headed out to the fields to pick our own strawberries. If you haven't done a berry picking trip with your kids before, go. The sight of your kids picking those berries, looking around to see if anyone's watching, then sneaking them into their mouths, is worth any complaints you hear from them on the walk to and from the field. Despite the sampling, we ended up with pounds and pounds of strawberries. I hated seeing them go to waste, and - as much as my husband would disagree - there are only so many baked goods one can make with strawberries. So I figured I'd try to make jam. The result was 9 half pint jars of some seriously good strawberry jam, and, surprisingly, it wasn't all that difficult to do.

This time, it was blueberry jam, with fresh blueberries the kids and I picked at Soergel's Orchards. A fair warning - blueberry jam requires a massive amount of berries... all right, 2.5 pounds, but more than my kids were in the mood to pick. They're my babies, not day laborers, so off we went inside Soergel's market to augment our own berries with a few extras.

After the kids were asleep (I did mention the hot boiling vat of sugar and fruit, right?), I set to work. The recipe is easy:

Blueberry Jam
(adapted from Ball Pectin recipe insert)

2.5 lbs (about 4 cups) crushed blueberries
2 Tbs. lemon juice
1 package Ball original fruit pectin
4 cups sugar

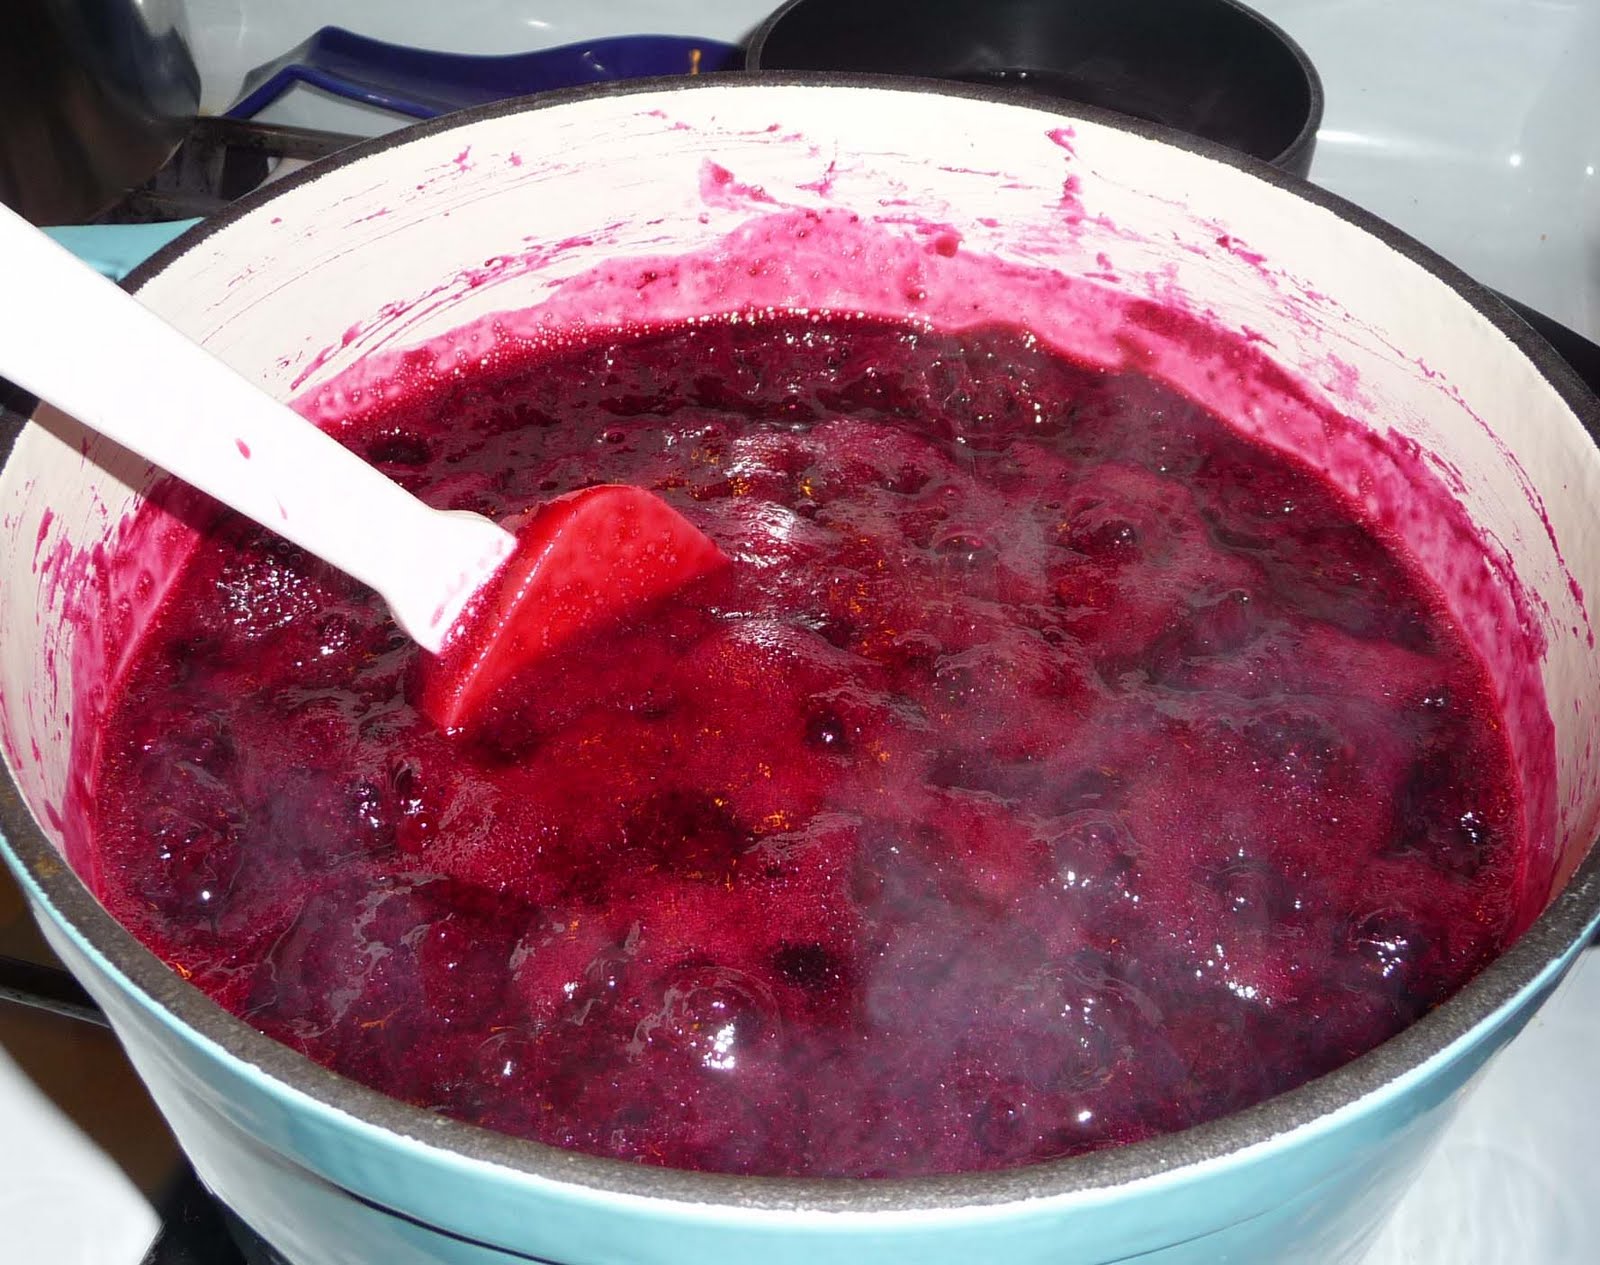
1. Combine crushed berries and lemon juice in large saucepan. Gradually stir in fruit pectin, and bring to a rolling boil over high heat, stirring constantly.
2. Add the sugar, stirring to dissolve. Return to a full rolling boil, and boil hard for 1 minute, stirring constantly. Remove from heat, and skim foam if needed. Recipe says you'll get 6 half pint (8 oz.) jars, but I got 7.

That's it for the jam. Really. The canning is also fairly simple. I follow the instructions that come with the pectin, using my big pasta pot instead of a canner and it hasn't failed me yet. I won't lie - you'll be sweaty. But yummy blueberry goodness is well worth it.